

 Culinary Arts and Sciences
Pie Crust Techniques
Pie Crust for Longer Cooking Times
Bourbon Pecan Pie
Real Naw'llins Prawleens
November 26, 1997
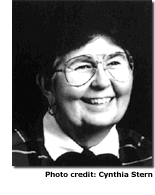
Among my favorite cooking and learning experiences have been the too-few classes I've attended taught by Shirley Corriher, who lives in Atlanta and has a merry, lilting voice with a marvelously thick Southern accent that you could cut with a knife. Corriher would be the first to tell you exactly which knife to use and how to hold it. She would also doubtless explain the exact cognitive processes that led you to pick up that knife. Corriher is a scientist, and what makes her classes uniquely rewarding and instructive is the joyous pursuit of the science behind the cooking (although she loves to cook and eat, too). Corriher's idea of fun is finding out, say, exactly which compounds make beets red and how to accent their color, how best to store lettuce and herbs, and how best to maintain the natural vitamins, minerals, and antioxidants in vegetables and fruits.
 All this is explained in just one chapter of Corriher's long-awaited,
extremely impressive and useful new book, CookWise. I've just begun mining its riches and expect to keep doing so for years to come. Like On Food and Cooking, a classic explanation of the science underlying food and its preparation by Corriher's good friend and colleague Harold McGee, CookWise will be essential for anyone who wants to know the whys of cooking.
All this is explained in just one chapter of Corriher's long-awaited,
extremely impressive and useful new book, CookWise. I've just begun mining its riches and expect to keep doing so for years to come. Like On Food and Cooking, a classic explanation of the science underlying food and its preparation by Corriher's good friend and colleague Harold McGee, CookWise will be essential for anyone who wants to know the whys of cooking.Corriher explains things that other authors take for granted: for example, what makes the emulsion that is necessary for mayonnaise and beurre blanc -- not to mention what ruins them and how to rescue them. She doesn't only give scientific understanding or tips. She gives full recipes with introductory and lateral explanations, in ways that will help any enthusiastic but uncertain cook who aims to follow any recipe.
Corriher can vanquish that fear. My first experience of her love of food was watching her make biscuits with her prized low-gluten White Lily flour. It changed my baking life. Now her thorough description of pie crusts should do the same. I'm including her introduction to her two favorite flaky pie crust recipes, both of which call for sour cream, which aids remarkably in keeping a crust together during the mixing and rolling yet also keeps it flaky when cooked. But I'm not giving those recipes here; you'll have to buy the book. Instead, an excellent basic-pie-crust recipe follows, one that will withstand long cooking -- as is necessary for her Bourbon Pecan Pie (which you can make, of course, without bourbon). Corriher is at her best with rich Southern dishes like this one. Note well the many hints for successful crust mixing, rolling, and baking, along with the indispensable instruction to "bake blind," or fully bake, any pie shell before filling and then baking it again. This is one of the chief secrets to a crisp crust.
If you still have a hankering to use pecans and sugar, go on to a very simple praline -- and remember to pronounce it right (prawleen), which Corriher cautions was a condition of her getting the recipe in the first place from a sterling New Orleans cook. These do require a candy thermometer, but no exotic ingredients or equipment. I plan to admire just this one recipe here, as I can tell on sight that I would be utterly unable to resist going through as many of these confections as were in front of me. They will make others' holidays very happy.
-- Corby Kummer
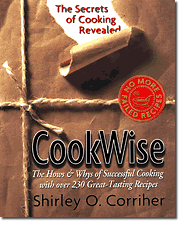
Excerpts from CookWise, by Shirley O. Corriher (William Morrow and Co. Inc.)
Pie Crust Techniques
Much depends on technique. Your perfect pie crust is very much up to you. For some, perfection is layers of delicate flakes. For others, it is an almost disintegrating tenderness. What is important is that you know how to achieve the crust that you want. The nature of the crust depends on the incorporation of the fat with the flour.
The goal for flakiness is to achieve firm, cold, flat pieces of fat coated with flour. Experienced pastry chefs do this just by flattening cold lumps of fat in a bowl of flour with their fingertips. Some cooks like to slice lumps of fat in a bowl of flour with a pastry cutter or two knives. Others prefer to let the blades of a beater cut cold lumps of fat into pieces in flour. For me, the best way is to dump cold flour and butter lumps out on a clean counter and roll with a rolling pin, scrape together, and reroll over the butter several times. This gives me wonderfully flat, flour-coated flakes of cold fat.
The goal for tenderness is to coat or grease flour proteins so that they cannot join together with water to form tough gluten. The softer the fat and the more it is worked into the flour, the better the flour proteins are greased. A cook may rub the fat and flour together or use a pastry cutter or knives to cut the pieces very fine or a mixer or food processor to incorporate the fat thoroughly into the flour.
Getting perfect flakiness
What is flaky? Flaky pastry is made up of delicately crisp, thin layers, as in puff pastry, croissants, and Danish pastry. Layers of cold, firm fat serve as spacers that keep the thin layers of dough apart in the hot oven just long enough for the dough to begin to set. The fat melts, and steam from the liquid in the dough forms and puffs the layers apart beautifully.
The fat must remain unmelted during the whole folding operation. If the butter gets warm and starts to melt and soak into the dough, there goes the flakiness! For flakiness, you must have cold, firm pieces of fat, big enough not to melt immediately -- (1/3- to 1/2- inch cubes). Recipes that say to cut the fat into the flour until it resembles coarse meal will not make flaky pastry. The fine pieces of fat melt too fast.
The pieces of cold fat must not only be large but also flattened out. Large lumps that are not flattened can be so big that they go all the way through the dough. When the fat melts, you end up with a hole in the crust.
Controlling the thickness
Rolling the dough to a uniform thickness is vital to prevent burning in thinner spots. Spacers, which you can purchase at cookware shops, create a dough of even thickness. As a substitute, you can use two rulers that are the thickness you want the dough to be. When you have partially rolled the dough and it is not far from the desired thickness, lay one spacer or ruler outside the edge of the dough and the other on the opposite side, rest the rolling pin on the two, and roll it across the dough.
Spacers like fat rubber bands that fit on each end of the rolling pin do the same job perfectly, and they come in sets of different thicknesses. These are available in Europe, but unfortunately I have not seen them in the United States. You may be able to improvise by layering several wide, thick rubber bands on each end of the rolling pin.
Shaping the edges
Roll the crust several inches larger than the pan so that 1/2 to 3/4 inch hangs over the edge after trimming. Fold under l/2 inch of crust all around the edges, making an even double-thick edge to flute. If the crust on the edge is not of even thickness, the thin spots will brown excessively or burn. With good shaping techniques, you can be bold with your designs and ideas.
After shaping, place the dough in the refrigerator to relax any gluten that you developed in pushing and pulling the crust into shape -- 30 minutes will minimize shrinkage. To chill the fat well for maximum flakiness, place the crust in the freezer for 10 minutes just before baking.
Baking blind
Prebaking a crust without the filling -- called baking blind -- makes a crisp crust. You can bake blind right side up or upside down if the edge is flat, not fluted. To bake the crust right side up, cover it with parchment or foil and fill the covered crust with weights to hold it down. For weights you can use raw rice, beans, pie weights, or -- my favorite -- pennies. It is important to weight the crust well, filling completely to the top of the edges to hold them in place.
Bake 15 minutes in the center of a preheated 400°F (204°C) oven. Remove the parchment and weights. Cover the edges with foil if they are browning fast. Bake 5 more minutes. Glaze with your choice of glazes and bake 4 to 5 minutes to cook glaze.
For a plain-edged crust, not fluted, baking blind upside down is a little easier and may give you a better crust. This procedure stretches the sides and gives you a slightly higher crust. When you bake the crust right side up, the sides can sag when the crust gets hot before the dough proteins set well to hold the shape.
To bake upside down, after you place the crust in the pan and chill it, cover the crust with a sheet of crumpled and smoothed wax paper and place a pie pan the same size as the one the crust is in on top of the wax paper. Turn both pans upside down, with the crust in the middle. Bake upside down for about 12 minutes in the center of a preheated 400°F (204°C) oven. Remove the top pan so that the pie crust bottom is exposed. Return the crust to the oven upside down and bake for 5 to 10 minutes longer. Replace the pan on top of the crust, turn the crust right side up, and remove the inside pan and wax paper. Bake about 5 minutes more to dry the inside well. Glaze the inside of the crust with your choice of glazes and bake for 4 or 5 minutes to cook the glaze.
Baking blind produces a superior crust. For a demonstration, I bake two pies made with the same dough and the same filling -- one baked with the filling in, the other baked blind, glazed, filled, and baked. The crust baked blind is always much nicer -- definitely crisper. A crisp, thoroughly cooked, and glazed crust has a good chance of staying crisp when the filling is added.
In many cases, like custard pies, baking the crust and the filling at the same time creates a dilemma. The crust needs to be baked at a high temperature to set the proteins before the fat melts (for flakiness and shape), but a delicate filling like a custard should be baked at a lower temperature. One solution is to bake for a short period at a high temperature (for a decent crust) and then turn the oven down to a temperature that will not overcook the filling. This is a compromise. Baking the crust blind at a high temperature and then baking the filling at an appropriate lower temperature in the prebaked crust produces a better filling and crust.
Pie Crust Techniques at a Glance
| What to do for tenderness: | Why |
| Have the fat warm -- soft. | Better coats gluten proteins and prevents gluten formation. |
| Cut fat into flour well to coat proteins. | Greased proteins cannot join together to form gluten. |
| Add sugar. | To reduce gluten formation. |
| Use acidic ingredients. | To break apart some gluten. |
| Limit working the dough after the liquid is added. | To limit gluten formation. |
| Use liquid fat as part of the liquid. | To limit gluten formation. |
| For flakiness: | |
| Cut cold fat into 1/4- to 1/2-inch cubes. | The fat must be large enough that it will not melt easily. |
| Flatten large pieces of cold fat by rolling out with the flour dry or by folding and rolling out dough a couple of times after the liquid is added or, best of all, use both together. | If fat is not flattened, large lumps of fat will go all the way through the crust, melt, and leave holes. |
| Keep the dough cold during the entire rolling and shaping process. | For flakiness, the fat must remain firm and unmelted. |
Pie Crust for Longer Cooking Times
This crust is formulated for fillings that take a long time to bake and pose the potential problem of an overbrowned crust. If this crust is too pale even after 25 to 30 minutes of blind baking and 45 minutes to an hour of baking time, go to 25 percent cake flour and 75 percent all-purpose and/or 10 percent shortening by volume and 90 percent butter.
|
3/4 cup bleached all-purpose flour 3/4 cup cake flour 1/4 teaspoon salt 4 tablespoons (1/2 stick) very cold butter, cut into tablespoon-size pieces |
4 tablespoons shortening, very cold, cut into tablespoon-size pieces 3 tablespoons ice water 1/2 teaspoon cider vinegar 1/2 teaspoon pure vanilla extract 1 large egg white, beaten |
2. When the flour-butter mixture is cold, dump it out onto a clean counter. Roll over the mixture with a rolling pin to flatten the butter and coat it with flour. Some butter will stick to the pin. Scrape it off and scrape the mixture together. Roll over the mixture again. Rapidly continue rolling and scraping together three times. Scrape back into the bowl and place in the freezer for 5 minutes. Add the pieces of shortening to the mixture and roll in, scraping and rerolling two or three times. Scrape the mixture back into the bowl and return to the freezer for 10 minutes. If the butter becomes very soft at any time during the rolling immediately return the mixture to the freezer for 5 minutes.
3. Stir together the water, vinegar, and vanilla in a small bowl. Then gently stir the water mixture into the flour-fat mixture. Pull the dough together into a round, wrap well in plastic wrap, and refrigerate for 30 minutes to several hours or overnight.
4. Preheat the oven to 400°F (204°C).
5. Shape the dough into a 6- to 8-inch disk about 3/4 inch thick. Lightly flour the counter, place the disk on counter, sprinkle lightly with flour, and roll out evenly. Place the rolling pin in the center of the dough disk, rolling forward and back (taking care not to roll off the dough and thin the edges), rotate the dough 45 degrees, and roll again. Keep a little flour on the counter to one side. If the dough tends to stick when rotating, drag it through the flour. When the dough is nearing the desired thickness, place one spacer or ruler at each side of the dough, rest the rolling pin on the two spacers or rulers, and roll it across the dough.
6. Place the dough in a shiny metal (not black) removable-bottom 9 x 1 1/2-inch tart pan and bake blind. Glaze with egg white and bake 3 to 5 minutes to set.
Variation: Orange Crust -- Stir 2 teaspoons finely grated orange zest into the crust with the water in Step 3.
Pie Crust Ingredients at a glance
| What to Do | Why |
| For tenderness: | |
| Use low-protein flour. | The flour contains less gluten-forming proteins. |
| In sweet pies, or other appropriate pies, add sugar. | Gluten-forming proteins bond with sugar instead of each other. |
| Use some acidic ingredients. | Acid breaks down gluten proteins. |
| Use some fat in liquid form to moisten, like oil or egg yolk. | Gluten-forming proteins cannot join together without water. |
| Instead of using water, use an ingredient that is part fat, like sour cream or cream cheese. | Gluten-forming proteins cannot join without water. |
| For flakiness: | |
| Use fats that are solid at room temperature, like lard or shortening. | These fats will remain firm in the oven long enough for the dough to set. |
| Use cold ingredients. | Cold ingredients keep fat firm longer. |
| Roll large (1/2-inch-square) nearly frozen butter lumps with flour to flatten. | Large flat pieces of fat create flakes. |
| For more color: | |
| Use ingredients that contain protein or sugar, like higher-protein flour, dairy products, or sugars. | Sugar and protein are needed for the browning reaction. |
| Use corn syrup. | Glucose (corn syrup) browns at lower temperatures than other sugars. |
| Add a little baking soda (alkali). | Baking soda neutralizes acidity and enhances browning. |
| For less color: | |
| Avoid proteins and sugars (use lower-protein flour). | Proteins and sugars are needed for the browning reaction. |
| Use part cake flour. | It is acidic and low-protein. |
| Use acidic ingredients like vinegar. | These ingredients increase acidity and limit browning. |
Bourbon Pecan Pie
As a child in Georgia, I spent exciting times searching for fallen pecans hidden in the leaves. On cold winter evenings, my grandfather and my uncle and I played rummy on a card table near the stove. We all cheated, and when we started to fuss with each other, my grandmother would make us put away the cards and shell pecans. Finding it just a fun new game, I would get involved in trying to shell a perfect pecan half.
Pecans and bourbon are a natural match. Good bourbon has a sweet, rich, mellow flavor that is excellent in many dishes, especially good with sweet potatoes and pecans.
|
1 cup pecan pieces 2 tablespoons and 4 tablespoons and 3 tablespoons lightly salted butter> (9 tablespoons total) 1/8 teaspoon and 1/8 teaspoon and 1/8 teaspoon salt (scant 1/2 teaspoon total) 1 cup and 2 tablespoons light corn syrup ( 1 1/8 cups total) 3/4 cup and 1/2 cup light brown sugar, packed (1 1/4 cups total) 2 tablespoons arrowroot |
2 tablespoons water at room temperature
2 tablespoons bourbon 2 teaspoons and 1/2 teaspoon pure vanilla extract (2 1/2 teaspoons total) 3 large eggs at room temperature 3 large egg yolks at room temperature 1 recipe Orange Crust variation of Pie Crust for Longer Cooking Times, prebaked in a 9-inch shiny or light-colored removable bottom tart pan (see Note) 1 1/3 cups pecan halves |
2. Roast the pecan pieces on a baking sheet in the center of the oven for 8 minutes only. While the pecans are hot, stir in 2 tablespoons butter and 1/8 teaspoon salt.
3. Raise the oven temperature to 400°F (204°C).
4. Boil 1 cup corn syrup, 3/4 cup brown sugar, 4 tablespoons butter, and 1/8 teaspoon salt in a medium size, heavy saucepan on medium heat for 3 minutes. Remove from the heat and let cool for 2 minutes. Stir together the arrowroot and water in a small bowl. Stir in the bourbon and 2 teaspoons vanilla. Stir this mixture well into the hot syrup. Stir the eggs and egg yolks together in a large bowl, then stir the hot syrup in a little at a time. Sprinkle pecan pieces over prebaked crust. Pour the filling over the pecans and bake in the lower third of the oven for 35 minutes. If the crust edge is getting too brown, cover just the edge with foil.
5. While the pie is baking, stir together and boil 3 tablespoons butter, 1/8 teaspoon salt, 2 tablespoons corn syrup, and 1/2 cup brown sugar in a medium-size, heavy saucepan for 1 minute. Remove from the heat and stir in pecan halves and 1/2 teaspoon vanilla.
6. Pile or arrange coated pecan halves on top of pie and return to the oven for 10 minutes.
Note: If the tart pan is 1 1/2 inches deep, use a 9-inch pan. If the pan is 1-inch deep, use a 10-inch pan.
Variation: For a plain pecan pie, omit the bourbon.
Real Naw'llins Prawleens
This is based on a recipe from Lee Barnes, which she gave me permission to use and to teach on the condition that I pronounce pralines correctly -- praw like claw, not pray -- "prawleens." Lee owned a large cooking school in New Orleans, and you would be hard-pressed to find anyone who has been in the food business there for a while who was not helped by Lee in some way. I was fortunate to be with her and her family for one or two weeks a year for many years when I taught there, and we had many adventures together. She died much too young and I miss her.
Lee always said, "Add more nuts for your favorite people." I frequently make these pralines with two different kinds of nuts. Many of my students make batch after batch of them for the holidays. They are the best that I have ever eaten, and many others say the same.
|
Butter for greasing foil 1 1/4 cups pecan or walnut pieces 1/2 cup almond slivers (optional) 2 tablespoons and 2 tablespoons butter (4 tablespoons/1/2 stick total) 1/4 teaspoon salt |
1 cup packed light brown sugar 1 cup granulated sugar 1/2 cup canned evaporated milk 1 teaspoon pure vanilla extract or good rum like Myers's |
2. Spread nuts on a baking sheet and roast until lightly browned, 10 to 12 minutes. If using almonds too, put them on the baking sheet near the oven door so that you can watch them. While the nuts are hot, stir in 2 tablespoons butter and sprinkle with salt. Set aside.
3. In a heavy medium saucepan, stir together well and boil the brown sugar, granulated sugar, evaporated milk, 2 tablespoons butter, and roasted nuts until mixture reaches the soft-ball stage (236°F/113°C). Let stand, undisturbed, for 4 minutes to cool. Add vanilla. Then start beating with a large wooden spoon. The second you feel the mixture begin to thicken, start spooning up the candies. Spoon heaped-tablespoon-size pralines as fast as possible onto the buttered foil. Let stand to cool and set. Store in an airtight container.
Note: If you want to make a double batch, add a tablespoon of corn syrup to the ingredients. This will slow crystallization just enough to allow you to spoon up the larger batch.
Copyright © 1997 by Corby Kummer.
Recipes from CookWise by Shirley O. Corriher. William Morrow and Company, Inc.: New York 1997. Hardcover, 476 pages. ISBN: 0-688-10229-8. $28.50. Copyright © by Shirley O. Corriher.